How to Pack for Your First Camping Trip
Gear Guides
So you’ve got your gear, you’ve picked a campsite, and you’re ready to go on your first camping trip. Now you just need to figure out how you’re actually going to get everything there. This guide will help you pack appropriately and organise your gear so your journey is as straightforward and pain‑free as possible.
Packing Mindset (What Beginners Get Wrong)
Packing for a camping trip isn’t just about gathering gear and putting it in a bag. The biggest mistake beginners make is assuming everything will naturally fit or that they can sort it out on the day. Camping gear is bulky, awkwardly shaped, and heavier than it looks, and it’s easy to underestimate how much space it takes up.
A good packing mindset is simple: pack with purpose, not panic. Think about how you’re travelling, how far you need to carry things, and what you’ll actually use once you arrive. When you pack with a plan, your gear becomes easier to manage, your journey becomes smoother, and you avoid the stress of digging through bags trying to find something essential.
How to Pack Your Gear (Step-by-Step)
Packing for a camping trip is easiest when you break it down into simple stages. Instead of throwing everything into bags and hoping it fits, organise your gear in a way that keeps it accessible, balanced, and easy to transport.
Step 1: Lay Everything Out First
Before you start packing, put all your gear on the floor or bed so you can see what you’re working with. This helps you spot duplicates, remove anything unnecessary, and make sure you haven’t forgotten something important.
Step 2: Group Items by Category
Organise your gear into clear groups:
Shelter (tent, poles, pegs, mallet)
Sleeping (bag, mat, pillow)
Cooking (stove, fuel, lighter, cookware, food)
Clothing
Essentials (torch, toiletries, water bottles)
Comfort items
Grouping things now makes packing easier later and stops you from burying important items at the bottom of a bag.
Step 3: Pack Heavy Items First
Heavy or bulky items like tents, cookware, and water bottles should go at the bottom of your main bag or rucksack. This keeps the weight stable and stops lighter items from being crushed.
Step 4: Use Smaller Bags to Stay Organised
Stuffing everything into one big bag makes it impossible to find anything. Use smaller bags or stuff sacks for:
toiletries
cooking utensils
electronics
clothing
first aid items
This keeps your gear tidy and makes unpacking at the campsite much easier.
Step 5: Keep Essentials Accessible
Anything you’ll need during the journey should be easy to reach:
tickets
snacks
water
torch
rain jacket
phone charger
Don’t bury these under your tent or sleeping bag - you’ll regret it halfway through the trip.
Step 6: Balance the Weight
If you’re carrying your gear, make sure your bag isn’t pulling you backwards or leaning to one side. A balanced bag is far more comfortable, especially if you’re walking any distance.
Step 7: Double‑Check Your Cooking Gear
Cooking gear is the easiest thing to forget. Make sure you have:
stove
fuel
lighter or matches
pot or pan
utensils
simple food you know how to cook
Missing any one of these can make cooking impossible.
Step 8: Pack With Your Journey in Mind
If you’re travelling by car, you can afford to pack more comfort items.
If you’re travelling by public transport, keep weight and bulk to a minimum.
This guide covers both in the next section.
Packing for Car Travel vs Public Transport
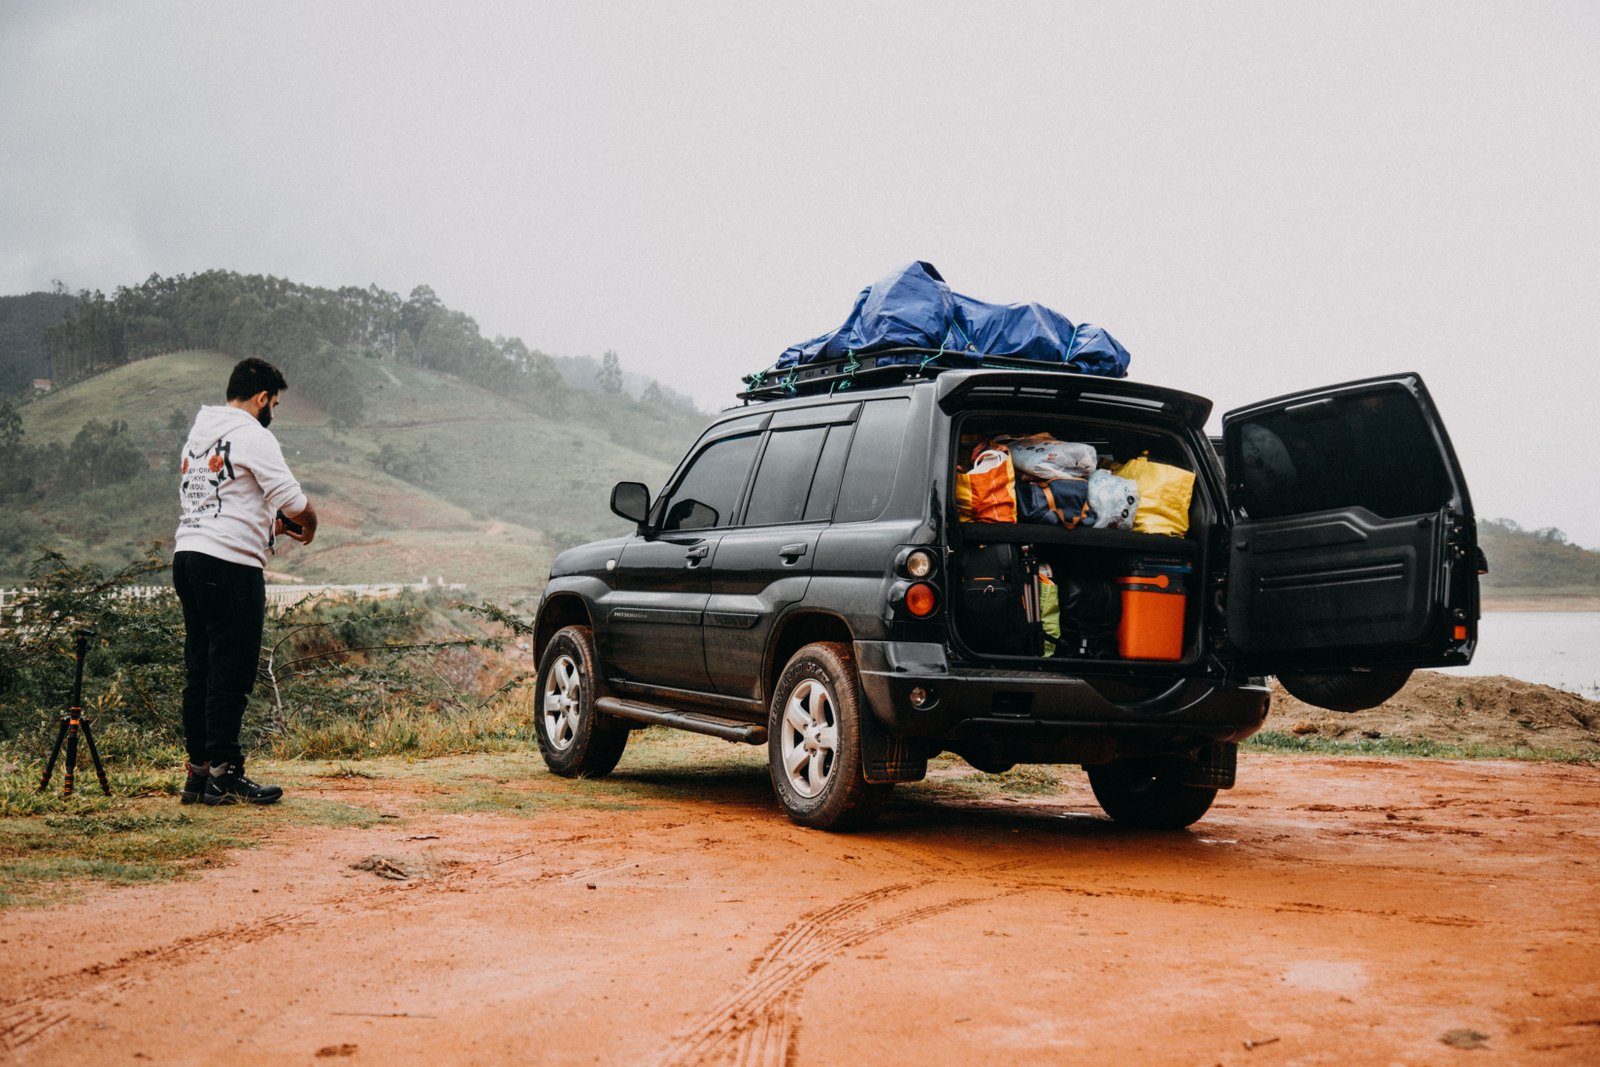
How you travel has a huge impact on how you pack. Car camping gives you far more flexibility with space and comfort items, while public‑transport camping forces you to think carefully about weight, bulk, and how far you’ll need to carry everything. Packing the right way for your journey makes the whole trip much easier.
Keep heavy items low and secure
Tents, water containers, and cooking gear should go on the bottom layer. This keeps the car stable and stops lighter items from being crushed.
But don’t bury your coolbox
If you’re bringing a coolbox, keep it low in the boot but not underneath your tent or bedding. You want it secure, but still easy to reach for drinks or snacks during the journey.
Keep arrival‑essentials easy to reach
Your tent bag should sit low in the boot for stability, but positioned at the front or side so you can pull it out first when you arrive. Keep other essentials like your mallet, torch, and rain jacket nearby so you don’t have to unpack the whole car before you start setting up.
Consider passenger space
If you’re travelling with others, remember that everyone’s personal bags, clothing, and comfort items take up room. A full car often has far less boot space than you expect, so pack realistically and avoid bringing bulky items you won’t actually use.
Give your car a quick tidy before packing
I’m a hypocrite for mentioning this because I definitely don’t do it, but packing is so much easier when your car isn’t already full of random bits and pieces. Clearing out old shopping bags, empty bottles, and loose items gives you more space and makes organising your gear far less stressful. This doesn’t mean removing essentials like your spare tyre, jumper cables, or emergency kit - just the everyday clutter that gets in the way.
Use bags instead of loose items
Loose gear rolls around in the boot and becomes hard to find. Packing your equipment into bags or boxes keeps everything organised, stops items shifting while you drive, and makes unloading at the campsite much quicker.
Packing for Public Transport
Packing for trains or buses is very different from packing a car. You’ll be carrying your gear far more often, whether that’s through stations, onto platforms, or along the final stretch to the campsite. Weight and comfort matter a lot more here, and beginners often underestimate how tiring it can be to carry bulky gear even for short distances.
Keep weight to a minimum
When you’re carrying all your gear yourself, every extra kilogram makes a difference. Be honest about what you’ll actually use on the trip and leave behind anything that’s bulky, heavy, or only useful in very specific situations. A lighter bag makes stations, platforms, and the final walk to the campsite far more manageable.
Share the tent weight if you’re travelling as a group
If you’re sharing a tent, you don’t all need to carry the same load. You can split the tent components between bags, or keep the tent packed together and let other group members carry more of the shared items so everyone’s pack feels manageable. The goal isn’t perfect equality — it’s making sure no one ends up struggling while someone else has a much lighter bag.
Use one main bag plus a small day bag
Most of your gear should go into one main rucksack. Alongside it, carry a small day bag - something like a bum bag or a compact sling - for essentials such as tickets, snacks, water, and your phone. Avoid using a second backpack or multiple loose bags; they’re awkward to manage on public transport and make the journey far more stressful.
Secure your tent properly to your rucksack
If your rucksack has straps at the bottom, feed the tent bag through them so it sits close to your back and doesn’t swing around. This keeps the weight stable and stops the tent from knocking into your legs while you walk. Avoid hanging the tent from the top handle - it puts too much strain on the stitching and can damage the tent bag over time.
Pack for balance, not convenience
When you’re carrying everything on your back, how you pack matters just as much as what you pack. Keep heavier items close to your spine and as low as possible in the rucksack - this helps with stability and reduces strain on your shoulders. Lighter items can sit higher up or towards the outside of the bag. And take a moment to check what’s sitting against your back: I once packed a cooking pot badly and spent the whole journey with it digging into my spine. A well‑balanced pack feels lighter, moves less, and saves you from that kind of misery.
Keep your hands free whenever possible
Travelling by train or bus is much easier when your hands are free for tickets, doors, and balance. Aim to keep everything on your back or in your day bag so you’re not juggling loose items. If you genuinely can’t fit something into your rucksack, only carry small, lightweight things in your hands - anything heavy or awkward will throw off your balance and make the walk to the campsite much harder.
Make essentials accessible
Keep the things you’ll need during the journey somewhere you can reach quickly. Tickets, snacks, water, and your phone should go in your day bag or an easy‑access pocket, not buried deep inside your rucksack. If you use a smartwatch with something like Google Wallet, it’s even easier - you don’t have to fish out your phone or ticket at all. The less you have to unpack on platforms or in busy stations, the smoother your trip will feel.
Plan for the final walk
Public transport rarely drops you right at the campsite, so expect a walk at the end of your journey. It might be ten minutes or it might be closer to half an hour, depending on the location. Pack with that final stretch in mind - a comfortable, balanced rucksack and free hands make a huge difference when you’re tired and just want to get set up. And when you finally reach the campsite, don’t pitch your tent at the first empty patch of grass just because you’re exhausted. Take a moment to find a flat, safe spot with enough space; a few minutes of patience here can save you a whole night of discomfort.
Be mindful of space on public transport
Trains and buses can get busy, so try to keep your gear tucked out of the way. Take your rucksack off and place it on the floor between your feet or in the luggage area if there’s space. Keep your tent secured to the bag so it isn’t swinging around or knocking into people. A compact day bag or smartwatch for tickets helps you avoid rummaging and keeps the aisle clear for everyone.
Stay aware of your surroundings
Public transport can be busy and fast‑moving, so keep an eye on your gear and the people around you. Make sure your rucksack isn’t blocking aisles, your tent isn’t swinging into anyone, and your day bag or smartwatch is ready when you need it. Staying aware makes the journey smoother for you and everyone else sharing the space.
Know your route ahead of time
Before you set off, take a moment to look over your route - not just the train or bus times, but how you’ll get from the station to the campsite. Knowing which exit to take, where the footpath starts, or whether there’s a short uphill section can save you a lot of confusion when you’re tired and carrying a full pack. Having this information ready on your phone or smartwatch means you can check it quickly without unpacking anything. Or if you’re more old‑school, keep the details printed out or written down - whatever helps you stay organised when you’re on the move.
Respect other passengers
Camping gear can be bulky, so be mindful of the people around you. Keep your rucksack close to your body, avoid blocking aisles, and make sure your tent isn’t swinging into anyone when you move. If the train is crowded, take your bag off and place it between your feet or in the luggage area so others have space. A little awareness goes a long way in keeping everyone comfortable during the journey.
Enjoy the journey
Travelling to a campsite by train or bus can be part of the fun. You get a chance to slow down, watch the scenery change, and ease into the trip before you even pitch your tent. Once your gear is packed comfortably and your essentials are easy to reach, the journey becomes simple — just settle in, stay aware, and enjoy the ride.
Weather-Proofing Your Gear
Pack your rain layer where you can reach it quickly
Rain has a habit of showing up at the worst possible moment - stepping off the train, halfway through the final walk, or just as you arrive at the campsite. Keep your rain jacket or waterproof layer right at the top of your rucksack or in an outer pocket so you can grab it instantly. If it’s buried under your tent or sleeping bag, you’ll end up unpacking half your gear in the rain, and everything else will get soaked before you even start.
This step is simple but it saves beginners from one of the most miserable camping experiences: getting drenched before you’ve even pitched the tent.
Keep your sleeping gear dry at all costs
Your sleeping bag and mat are the last things you want getting wet. Even a small amount of moisture can make them cold, heavy, and uncomfortable to use. Pack them inside a waterproof liner or wrap them in something that keeps out rain - anything that creates a barrier is better than letting them sit loose in your rucksack. If you’re travelling in bad weather, double‑check that the opening of the bag is sealed properly so water can’t sneak in while you’re walking. Dry sleeping gear means a warm, comfortable night, no matter what the weather does.
Waterproof your rucksack
Most rucksacks can handle a light shower, but heavy rain will eventually soak through. A simple waterproof barrier inside the bag makes a huge difference. Line the inside with something that keeps water out, then pack your gear inside that layer so even if the outside of your rucksack gets drenched, the contents stay dry. Make sure the liner is sealed properly at the top - rain has a sneaky way of finding gaps, especially when you’re walking and the bag shifts around.
Keep electronics sealed
Electronics are some of the easiest things to ruin with unexpected rain, and they’re often the hardest to replace once you’re already at the campsite. Keep anything sensitive - your phone, power bank, head torch, or cables - inside a sealed pocket or wrapped in something that keeps moisture out. Even light drizzle can creep into zips and seams over time, especially during long walks. A simple barrier keeps everything safe, dry, and ready to use when you need it, rather than leaving you with a dead phone or damp torch on your first night outdoors.
Use liners or dry bags to create a waterproof barrier
You don’t need anything fancy to keep your gear dry - you just need a reliable barrier between your equipment and the weather. A simple liner inside your rucksack stops rain from soaking through the fabric and reaching your clothes, sleeping gear, or electronics. You can also use smaller waterproof bags inside the main compartment to separate things that absolutely must stay dry from things that can handle a bit of moisture. The goal isn’t perfection; it’s making sure that if the weather turns, your most important items stay protected.
Manage wet clothes properly
Wet clothes are almost guaranteed at some point during a camping trip, whether from rain, sweat, or an unexpected puddle. Don’t shove them deep into your rucksack - they’ll make everything else damp and start to smell. Keep wet items separate from your dry gear, ideally in their own sealed pocket or wrapped so moisture can’t spread. Once you reach the campsite, hang them up as soon as you can, even if the weather isn’t perfect. Slightly‑damp clothes dry surprisingly fast outdoors, and keeping them separate protects the rest of your kit from turning soggy.
Arriving at camp in the rain
Turning up at a campsite in the rain can feel chaotic, but a little preparation makes it much easier. Before you start unpacking, take a moment to spot a flat, safe pitch so you’re not rushing into a bad spot just because you’re soaked. Keep your tent bag, mallet, and rain jacket somewhere you can reach quickly so you don’t have to dig through your rucksack in the weather. Once the tent is up, you’ll have a dry space to sort everything else properly - getting shelter sorted first keeps the rest of your gear protected and helps you settle in without stress.
Don’t rely on the weather forecast
Weather forecasts are helpful, but they’re never perfect - especially in the countryside, where conditions can change quickly. Even if the forecast says clear skies, pack as though rain is a real possibility. A simple waterproof layer, a sealed liner inside your rucksack, and a dry place for your sleeping gear mean you’re prepared no matter what the sky decides to do. It’s far better to carry a little extra protection than to spend your first night outdoors dealing with damp clothes or a wet sleeping bag.
Packing Food and Cooking Gear
Packing food and cooking gear is one of the easiest parts of camping to overthink. Beginners often bring too much, forget something essential, or choose meals that are far too complicated to cook outdoors. A simple, well‑planned food setup keeps things stress‑free, saves space in your bag, and makes mealtimes at the campsite much more enjoyable. This section helps you choose what to bring, how to pack it, and how to avoid the common mistakes that can turn cooking into a chore.
Bring simple food you know how to cook
Cooking outdoors is very different from cooking at home, and beginners often make the mistake of bringing complicated meals that need lots of ingredients or precise timing. Stick to simple foods you already know how to make — things that cook quickly, don’t require much fuel, and won’t leave you frustrated if the weather turns. The goal isn’t gourmet cooking; it’s making sure you can eat something warm and satisfying without stress.
Double‑check your cooking essentials
Cooking gear is one of the easiest things to overlook when you’re packing, and missing even a single item can make preparing food much harder than it needs to be. Before you zip up your rucksack, take a moment to check you’ve got the basics you’ll rely on at the campsite: your stove, the right fuel for it, a lighter or matches, a pot or pan, and the utensils you actually use. These are the core pieces that make cooking possible, and forgetting any one of them can turn a simple meal into a frustrating puzzle. A quick check now saves you from discovering a missing essential when you’re already hungry and ready to eat.
Pack food so it’s easy to reach when you arrive
When you get to the campsite, you’ll want to eat sooner than you think - especially if you’ve been travelling or pitching your tent in less‑than‑perfect weather. Keep your food somewhere you can reach quickly without unpacking your entire rucksack. Dry foods, snacks, and anything you’ll want soon after arriving should sit near the top of your bag or in an outer pocket. This saves you from digging through layers of gear when you’re tired, hungry, and just want something simple to eat before you settle in.
Keep your cooking gear packed sensibly
Cooking gear is awkwardly shaped, and if you pack it badly it will shift around, dig into your back, or get buried under heavier items. Keep your pot or pan near the top of your rucksack so it doesn’t crush softer items, and place your stove and fuel somewhere stable so they don’t rattle or roll. Utensils, lighters, and small cooking bits should go in a separate pocket or small
How to Pack Your Clothing
Pack clothing in clear categories
Separate your clothing into simple, obvious groups: daytime clothing, night‑time clothing, spare warm layers, waterproofs, socks, underwear, and a spot for dirty or damp clothes. When everything has a clear “home”, it’s much easier to find what you need and avoid mixing clean and dirty items together.
Keep night‑time clothing separate
Night‑time clothing should stay clean, dry, and easy to reach. Pack it in its own pouch or small bag so you’re not digging through your daytime layers at the end of a long day. Knowing exactly where your sleep clothes are makes getting ready for bed much calmer.
Roll your clothes to save space
Rolling clothes instead of folding them helps save space and keeps things tidier inside your bag. It also makes it easier to see what you’ve packed at a glance, rather than dealing with a stack of folded items that collapse into a mess the moment you pull one out.
Keep warm layers accessible
Weather can change quickly, especially in the UK. Keep your warm layers - hoodies, fleeces, or insulated jackets - near the top of your bag or in an outer pocket so you can grab them as soon as the temperature drops. Don’t bury them under your tent or sleeping gear.
Separate clean and dirty clothing
Dirty or damp clothes can make the rest of your gear smell and feel unpleasant. Keep a dedicated bag for used clothing so it doesn’t mix with your clean items. Even a simple plastic bag or stuff sack works - the goal is just to stop moisture and smells spreading through your rucksack.
Pack socks and underwear where you can reach them
You’ll reach for socks and underwear more often than almost anything else. Keep them in a small pouch or packing cube near the top of your bag so you’re not hunting for them every morning. Having a clear, easy‑to‑reach spot for these basics makes camp life feel much more organised.
Use packing cubes or small bags
Packing cubes or small drawstring bags make a big difference to how tidy your clothing feels. They stop items drifting around your rucksack and make it easier to grab exactly what you need - a fresh t‑shirt, a warm layer, or your sleep clothes — without unpacking everything.
Keep waterproofs at the top
Your waterproof jacket and trousers should never be buried deep in your bag. Keep them at the top or in an outer pocket so you can throw them on quickly when the rain starts. This simple step saves you from unpacking in bad weather and keeps the rest of your gear dry.
Pack with the weather in mind
Think realistically about the forecast and the time of year. Cool evenings, damp mornings, and sudden showers are common, so lean towards layers you can add or remove easily rather than one “perfect” outfit. It’s better to have a few flexible options than to rely on a single set of clothes that doesn’t quite fit the conditions.
How to Pack Your Essentials
Essentials are the small, everyday items you rely on constantly during a camping trip. They’re not big pieces of gear, but they’re the things you’ll miss immediately if you forget them - the torch you reach for at night, the washbag you use before bed, the power bank that keeps your phone alive, or the first aid kit you hope you won’t need but are glad to have.
Essentials typically include:
torch or headlamp
toiletries and washbag
first aid kit
phone, power bank, and charging cables
water bottle
important documents (tickets, booking details)
small tools (lighter, penknife, repair bits)
weather‑related extras (rain jacket, warm hat)
Keep essentials in one main pouch
Instead of letting essentials drift around your rucksack, keep most of them in one dedicated pouch or small bag. This becomes your “grab bag” for everyday items - if you need something important, you know it’s in there. It also makes it much easier to move your essentials between bags if your setup changes.
Pack your torch where you can reach it quickly
Your torch or headlamp is one of the most important essentials at camp. Pack it somewhere you can reach without unpacking half your gear - a top pocket, hip belt pocket, or day bag all work well. The first time you arrive back at your tent in the dark, you’ll be glad you know exactly where it is.
Keep toiletries sealed and separate
Toiletries have a habit of leaking at the worst possible time. Keep them in a washbag or small pouch, and store that away from anything that absolutely must stay dry, like your sleeping bag or spare layers. Even if something spills, it’s contained and doesn’t spread through the rest of your gear.
Keep your first aid kit accessible
A first aid kit is only useful if you can reach it quickly. Pack it near the top of your bag or in a side pocket rather than burying it under heavy items. You don’t need a huge kit, but having plasters, painkillers, antiseptic wipes, and a few basics ready to go makes minor problems much easier to deal with.
Protect your electronics from weather and knocks
Phones, power banks, and cables are easy to damage with rain or rough handling. Keep them in a sealed pocket, dry bag, or padded pouch so they’re protected from moisture and knocks. This also stops cables tangling around other gear and makes it easier to find what you need when you’re low on battery.
Keep your water bottle easy to reach
Your water bottle should live in an outer pocket or somewhere you can grab it without opening your main bag. This makes it easier to stay hydrated on the move and stops condensation or minor leaks from soaking your clothing or food.
Keep important documents safe and accessible
Tickets, campsite booking details, and travel information should be stored somewhere secure but easy to reach - a zipped pocket, small document wallet, or day bag. You don’t want to be digging through your main rucksack on a busy platform just to find a booking reference.
Use small bags to separate different essentials
Breaking your essentials into a few small bags - one for toiletries, one for electronics, one for first aid, one for tools and spares - keeps everything organised and easy to find. It also makes it simpler to check you’ve packed everything before you leave home.
Keep weather‑related essentials at the top
Rain jackets, warm hats, and gloves should sit near the top of your bag or in outer pockets. These are the things you’ll reach for when the weather turns, and having them accessible makes a big difference to how comfortable you feel during the trip.
Pack essentials based on how you’re travelling
If you’re travelling by car, some essentials can live in the glove box or door pockets so they’re always within reach. If you’re travelling by public transport, keep your most important items - tickets, phone, power bank, torch, and water - in your day bag so you don’t have to open your main rucksack on busy trains or platforms.
Final Packing Checklist
Shelter
Tent, poles, pegs, mallet
Groundsheet or footprint
Tent stored where it’s easy to reach on arrival
Sleeping Gear
Sleeping bag (packed dry)
Sleeping mat (protected from damage)
Pillow
Night‑time clothing
Liner or extra blanket
Bedtime essentials accessible
Cooking & Food
Stove + correct fuel
Lighter or matches (plus backup)
Pot or pan
Utensils in a pouch
Simple food you know how to cook
Snacks
Water stored separately from food
Small bin bag for waste
Clothing
Daytime clothing
Night‑time clothing
Warm layers accessible
Waterproofs at the top of your bag
Socks and underwear
Bag for dirty or wet clothes
Essentials
Torch or headlamp
Toiletries (sealed)
First aid kit
Phone + power bank + cables
Water bottle
Important documents
Small tools (lighter, penknife, repair bits)
Weather‑related essentials (rain jacket, warm hat)
Organisation
Packing cubes or small bags
Waterproof liner or dry bags
Balanced rucksack
Day bag for public transport
Final Conclusion
Packing well isn’t about bringing everything - it’s about bringing the right things and knowing exactly where they are. When your gear is organised, dry, and easy to reach, the whole trip feels calmer from the moment you leave home to the moment you pitch your tent. Use the checklist, trust your setup, and enjoy the freedom that comes with a well‑packed bag.